Home About Me My Calendar My Artwork Gallery Customer Care Program Idea Book Join My Team Shop Online Workshops On The Go Hostess Clubs Fundraisers Email Me For Sale Studio J
Showing posts with label Layouts. Show all posts

Saturday, June 30, 2012

Stamp of the Month Blog Hop {Live Out Loud}


It's time once again for our Stamp of the Month Blog Hop! This month, we are featuring July's Stamp of the Month, Live Out Loud, set of 8.


If you've come from {Elizabeth's Blog}, you're on the right path. We have over 50 Close To My Heart Consultants sharing their creations using this month's SOTM and other great CTMH products on their blogs. This is simple to do - just click on the link at the end of the post on each blog to move to the next one! Here we go! 

(click on the photo for a larger image) 

I LOVE this month's stamp set! The fun fonts and quotes/sayings are fabulous and PERFECT for my boys.  I decided to pair this stamp set up with our wonderful Victory Level 2 Paper Packet, as well as the stamp set from the Victory Workshop on the Go.  The layout sketch is from Studio J - our online digital scrapbook program.  Since I've used this layout several times before, it was easy for me to get measurements and recreate it with paper.  The circles and quarter-circle were cut using the Cricut AP cartridge. The "Live Out Loud" quote fit perfectly in the small Bamboo circle on the left page. I added in a little twill ribbon (retired) and a few of the Milepost Shapes stars, and finished it off with a few Colonial White Brads.

Supplies
Stamps - Live Out Loud (SOTM) and Victory WOTG
Inks - Chocolate
Accessories - Twill Ribbon (retired), Milepost Shapes, Colonial White Brads
Now, please "hop" on over to {Annette's Blog} to check out her fabulous artwork! Be sure to visit all the Consultants at their blogs to get some great crafting ideas and other fun ideas! The complete list of participants is here.


Don't forget, the Stamp of the Month is only available until July 31st! Contact your consultant, or click here!
Everyone who purchases the Stamp of the Month from me is invited to my FREE Stamp of the Month workshop next month where we will create a fabulous project or two using Live Out Loud. Check my calendar for dates and times!

Until next time...
Debra

Sunday, June 10, 2012

Pemberley Workshop on the Go

We had our monthly Workshop on the Go workshop last Sunday.  May got too hectic for most of us, so we had to postpone our May workshop.  For this workshop, we used the Pemberley Workshop on the Go kit and coordinating stamps and accessories.

You may remember this layout from the beginning of May with the Stamp of the Month Blog Hop.  I gave workshop attendees the option to follow the WOTG brochure or complete the layout as I did.


Here is the additional layout shown in the WOTG brochure. The pattern is from Magic - Transfigure.  I apologize for the quality of the photos.


Here's a few close-ups of some of the details.  The title is cut on the Cricut AP cartridge, as are the banner pieces, which were then stamped with the flower stamp from the Pemberley WOTG kit. The Bitty Pearl Opaques make the "string" for the banner.


These two photos show the Cricut AP envelope. It's the perfect thing for adding a little hidden journaling or perhaps an extra photo or two.


For our Bonus Layout, I chose this layout from the Idea Book, also from Magic - Enchanted.  There is no stamping on this layout - only My Stickease. I added the Bamboo photo mats from my cardstock stash. I seem to have better luck if I have pre-made pages and make my photos work with what I have.


Here's a close up shot of the My Stickease cluster. I added a lot of the Bitty Pearl Opaques to the center of the large rose sticker. I also used 3D Foam Tape for added dimension when creating the cluster.


Supplies 
Pemberley Paper Packet
My Acrylix® Pemberley Workshop Stamp Set (C-size)
Colonial White Cardstock Sheets (2)
Bouquet Assortment
Bitty Opaques Pearl Adhesive Gems
Instructional Guide
 
Contact me for more information about joining our monthly WOTG workshop or hosting one of your own with your friends & family.  We'll be using Victory for our June workshop. 

Until next time...
Debra

Monday, April 30, 2012

Stamp of the Month Blog Hop {Friendship Bouquet}


It's time once again for our Stamp of the Month Blog Hop! This month, we are featuring May's Stamp of the Month, Friendship Bouquet, set of 8.


If you've come from {Wendy's Blog}, you're on the right path. We have about 60 Close To My Heart Consultants sharing their creations using this month's SOTM and other great CTMH products on their blogs. This is simple to do - just click on the link at the end of the post on each blog to move to the next one! Here we go!

Each month, I try to incorporate the Stamp of the Month into at least one of our 3 layouts for our WOTG.
I chose to use the Pemberley WOTG layout and slightly modify it. I have to thank Annette Green for the inspiration to "spruce-up" (as she put it) this layout. As I had most of the pieces already cut, (I'm one for following instructions) I wasn't about to redo it all, but adding that strip of the Indian Corn Blue B&T helps. I don't normally add a title to my layouts until I have my photos down, but being as Mother's Day is in May, I thought that would be a fitting title.  Now to find some pics of my mom :)

Here's a few close ups with the details...

I used the large flower, stamped in Timber Brown Staz-On ink, then colored the center with Cocoa ink. For the petals, I chose to use Honey ink in the middle and Buttercup for the outside using my water brush.  The leaves were colored with Olive ink using the water brush.

I used the verse on the tag and adorned it with 3 bitty pearls in the corner.
I used 3D foam tape for the sunflower and leaves.

For the right side, I moved the title above the strip.  I decided on a cluster of sunflowers - 1 large and 2 small.  They were stamped again with the Timber Brown Staz-On ink, then colored using ink and the water brush.

The title is cut with the Cricut AP cartridge at 1 1/2", then sponged with Desert Sand ink.
I added 3 of the bitty pearls to the left side of each letter.

I stamped the "Treasured Friend" in Desert Sand ink under the Indian Corn Blue pattern strip and adorned it with a bitty pearl on each side.

Again, I used 3D foam tape to add dimension to the flowers and leaves.

Supplies
Stamps: Friendship Bouquet (May SOTM), Pemberley WOTG


Now, please "hop" on over to {Lori's Blog} to check out her fabulous artwork! Be sure to visit all the Consultants at their blogs to get some great crafting ideas and other fun ideas! The complete list of participants is here.

Don't forget, the Stamp of the Month is only available until May 31st! Contact your consultant, or click here!
Everyone who purchases the Stamp of the Month from me is invited to my FREE Stamp of the Month workshop next month where we will create a fabulous project or two using Friendship Bouquet. Check my calendar for dates and times!

If you are joining me for our Pemberley WOTG Layouts workshop on May 20th, you will also have the option of doing this page, instead of the one featured in the brochure.  


Until next time...
Debra

Monday, April 16, 2012

Dotty For You! - "Fun" Layout

Our National Scrapbooking Promotion starts tomorrow.  I thought I had signed up to participate in the fabulous blog hop to show off these fun, vibrant, and exclusive papers, but apparently that was just a thought.  So, since I scurried to create a layout at the last minute this evening, I figured I would go ahead and share it.


I used Imagine - Thumbnails for my pattern. The base is the one of the 12 fun patterns from the Dotty for You paper packet.  I just LOVE this pattern.  To dress it up a bit, I cut a tag using the Cricut Art Philosophy Cartridge.  I also cut an envelope using the Cricut AP.  I traced the closing flap and decorated it with the same paper. Yes, I planned the "Smiles Admitted" piece ;)  I added a couple of silver brads and a piece of Baker's Twine to make the closure on the envelope.

Here's a couple more photos...
This is a close-up of the envelope. I cut a 3 1/4" piece of Colonial White for the journaling.


The title is from the April Stamp of the Month, You Are. I stamped it in second generation Grey Wool, then stamped in Lagoon just offset to create a shadow.

Supplies 
Inks: Grey Wool and Lagoon
Cricut AP:  [Tag4] Cut at 4", Shift + Font Layer [Flower6] cut at 3 1/2" (envelope)

There's three ways you can get this fun new paper packet...
  1. Place a $35 order from the Spring/Summer Idea Book between April 17th and May 31st, while supplies last, and you may add this paper packet to your order for only $5 - that's a discount of $14.95!  The best part? You can add one paper packet for every $35 you spend! So spend $70, get 2 paper packets! How cool is that!
  2. Host a Gathering with a sales total of $400 or more (excluding tax, shipping/handling, and Operation Smile® donations) between April 17th and May 31st and receive a Dotty for You paper packet FREE. Check my calendar for available dates!
  3. Join Close To My Heart as a new Consultant between April 1 and May 31 and receive a Dotty for You paper packet FREE. Click here to learn more about joining my team and becoming a consultant.  Click here to join and get your Dotty for You paper packet for FREE! 
If you'd like to see more ideas and artwork using this fabulous paper packet, start with my friend and fellow Consultant, Helen, and go through the fabulous blog hop! There's sure to be some AMAZING artwork! Next time, I'll remember to actually sign up ;)
 
Until next time...
Debra

Saturday, March 31, 2012

Stamp of the Month Blog Hop {You Are}


It's time once again for our Stamp of the Month Blog Hop! This month, we are featuring April's Stamp of the Month, You Are, set of 15.

If you've come from {Georgia's Blog}, you're on the right path. We have about 50 Close To My Heart Consultants sharing their creations using this month's SOTM and other great CTMH products on their blogs. This is simple to do - just click on the link at the end of the post on each blog to move to the next one! Here we go!

I was supposed to take this stamp set to St. Louis with us this week and work on my project. I'm really glad that I forgot to take it with me! After we got home today, I had this idea to go with our Cruisin' workshop layouts. I'll be using the Cruisin' layouts to highlight our trip, and this stamp set was perfect to add to those layouts. Here is one of the pages we'll be doing for our workshop. It's actually taken directly from the Idea Book, and will be the first page of my family's Spring Break album.  It is still a work in progress as most of the photos from our trip are still on either my camera or the laptop.


I used the word border stamp to create a border around the outside edge of the Juniper mat with Cranberry ink.  I used the stars in between the wording with Grey Wool ink.  To create the corner designs, I chose one of the semi-circle images and stamped it sideways, then rotated it to create a medallion of sorts. 

I'm not one to sew, but I do like the look. I decided to cut apart the stamp that has the words and the dots. I then used just the dots to create a border using our White Daisy ink. As this is a pigment ink, I did heat set it with my heat tool.

Supply List
Stamps: You Are (April Stamp of the Month), Adventure USA 

Now "Hop" on over to {Dawn's Blog} to check out her fabulous artwork! Be sure to visit all the Consultants at their blogs to get some great crafting ideas and other fun ideas! The complete list of participants is here.

Don't forget, the Stamp of the Month is only available until April 30th! Contact your consultant, or click here!

Until next time...
Debra

Wednesday, February 29, 2012

Stamp of the Month Blog Hop {Potential}


It's time once again for our Stamp of the Month Blog Hop! This month, we are featuring March's Stamp of the Month, Potential, set of 8.

If you've come from {Sarita's Blog}, you're on the right path. We have about 60 Close To My Heart Consultants sharing their creations using this month's SOTM and other great CTMH products on their blogs. This is simple to do - just click on the link at the end of the post on each blog to move to the next one! Here we go!


I have to thank fellow Consultant, Vicki Wizniuk for this month's project inspiration.  She posted a layout similar to this on our Consultant boards and a light bulb finally went off in my head! This was a particularly hard stamp set for me to work with.

The layout sketch is from our retired You & Me Special from May 2011, modified to fit 4x6 photos. I used the new Stella papers - LOVE these colors!

Here's a few close ups and some creative notes....

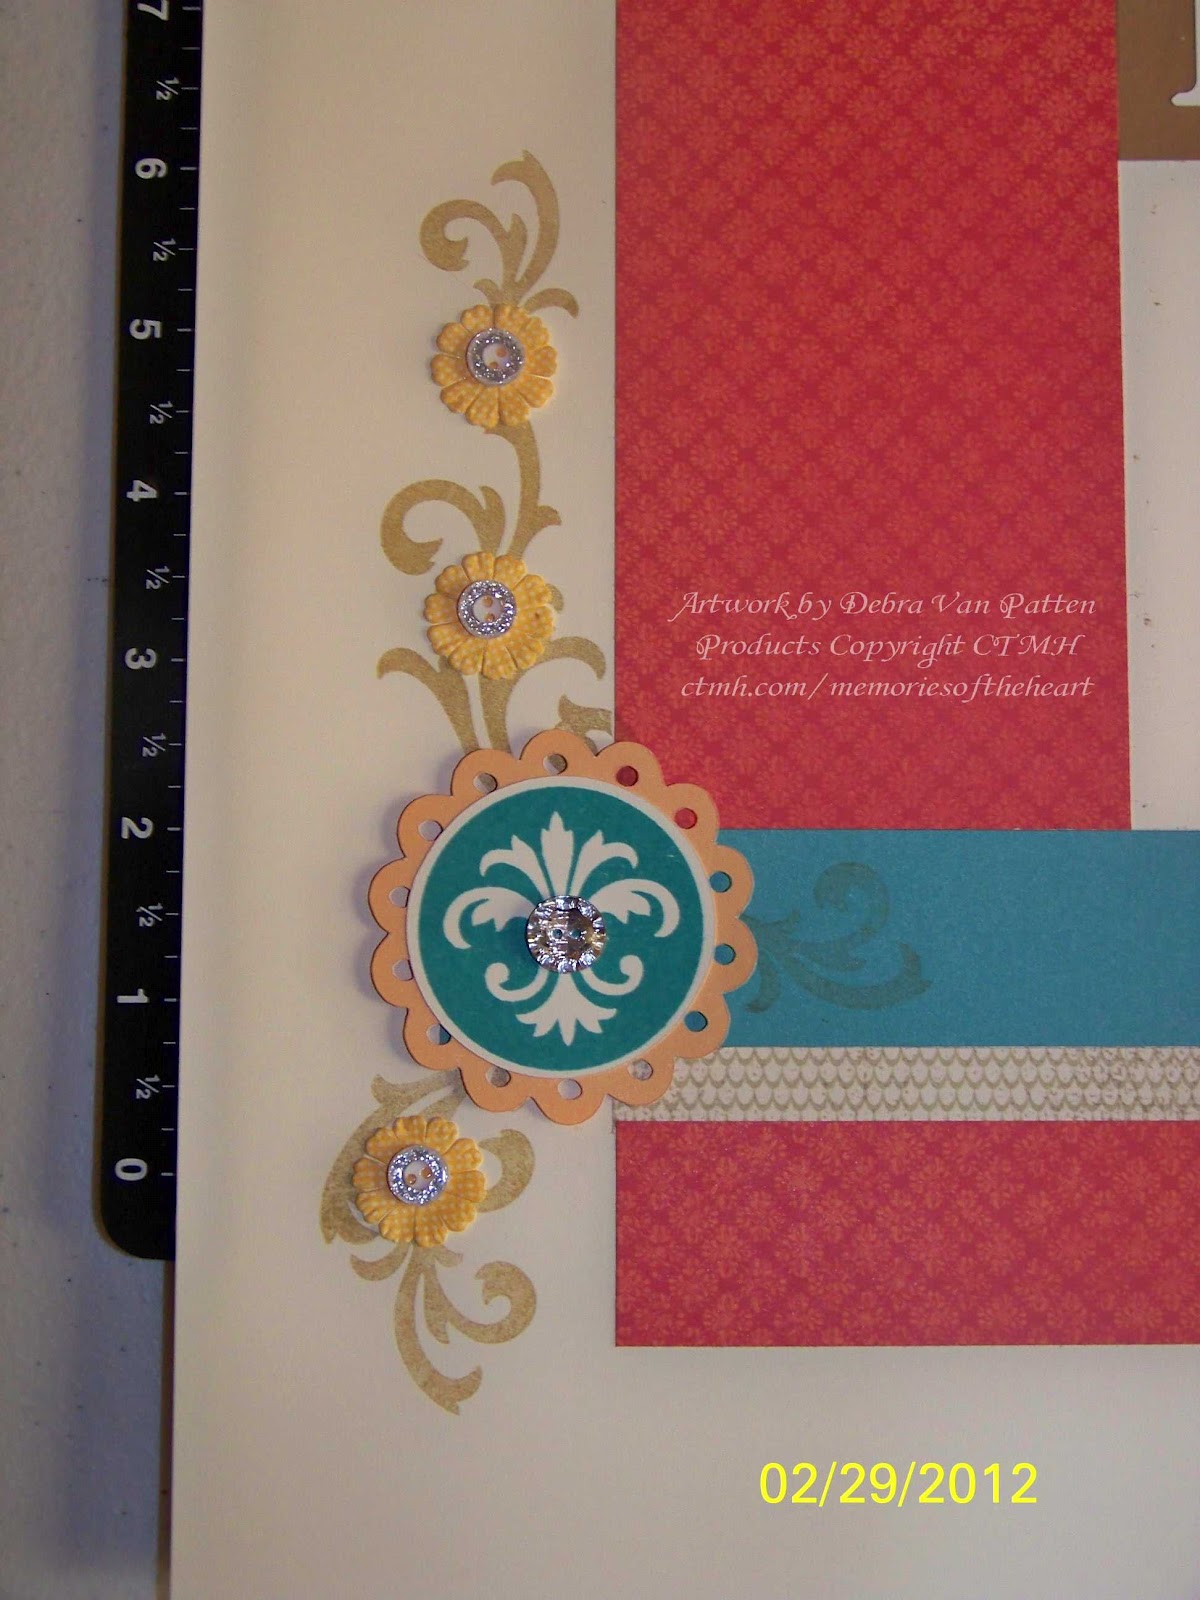
I used the Cricut Art Philosophy cartridge to cut the title at 1 inch. The cartridge also coordinates with this month's stamp set. The circle is cut at 1 3/4", then the accent is stamped in Lagoon ink. I matted it on a Creme Brulee fancy circle, also cut with the Cricut AP cartridge - Shift + Decorative Layer [Circle3] at 2 1/4". The phrase "Anything is possible" is stamped in Tulip ink. The flourishes are stamped in Desert Sand ink.

To finish off the page, I added a Bling Button to the center of the stamped accent.
I used the small Creme Brulee paper flowers from the new Paradise Paper Flowers collection, then added a small Glitter Button from the Bohemian Assortment to the center of those.

For the left page, I again used the Cricut AP cartridge and cut journaling box using [Shape8] at 3 inches in Creme Brulee, and 2 1/2 inches in Colonial White. I also stamped the flourishes in Desert Sand again and added the Creme Brulee flowers and Glitter Buttons.


Supply List
Cricut AP: [Circle1] - 1 3/4" (pg. 21), Shift + Decorative Layer [Circle 3] - 2 1/4" (pg. 41), [Shape8] - 2 1/2" & 3" (pg. 47), plus the title "Together" (font layer).


Now "Hop" on over to {Susan's Blog} to check out her fabulous cards! Be sure to visit all the Consultants at their blogs to get some great crafting ideas and other fun ideas! The complete list of participants is here.

Don't forget, the Stamp of the Month is only available until March 31st! Contact your consultant, or click here!

Until next time...
Debra

Monday, January 16, 2012

Workshop on the Go – Wonderland Layouts

I actually finished my sample pages BEFORE our monthly workshop on Sunday! I LOVE these papers, even though we’ve had no measurable snow to mention here in Southern Indiana, but I’m sure it’s coming.
We’ll be creating 3, 2-page layouts using the gorgeous Wonderland Level 2 Papers and coordinating stamps and accessories.
Here’s the featured layout from the WOTG Brochure:
Wonderland Featured Layout I did modify the layout just a tad. Instead of the rounded tabs, I used half-scallops.
The piece of paper sticking on the left page is actually a piece off of my glue dots roll. I forgot about sliding a picture under the chocolate dot ribbon and put adhesive on the entire length of the paper :( Thankfully, I had a scrap piece of the wax paper from my glue dots to save me having to pull it up later to add a picture.
Here’s a couple of close ups of the details:

Wonderland Featured Layout Close Up
Wonderland Featured Layout Close Up 2
Wonderland Featured Layout Close Up 3
Here’s the second layout we will be doing:
Wonderland Magic Layout This layout is from Magic – Secret. Again, I modified it slightly from the layout shown in the WOTG brochure. Instead of using the coffee cups from the stamp set, I added in a couple of Top Coats Icing Overlays (now sold out).
I always have a selection of stamps, and since this group usually orders the My Stickease to go with the papers, there are several options for personalizing your layouts.
Here are a couple of close ups of the details:
Wonderland Magic Layout Close Up Wonderland Magic Layout Close Up 2
The third layout we will be doing is from Imagine – Powerful Trio. This layout is also featured in the Autumn/Winter Idea Book (pg. 58).
Wonderland Imagine Layout Again, I modified it slightly from the one shown in the Idea Book, but only to work with what papers were left after creating the first two layouts from the WOTG Guide. There is NO stamping on this layout! I did use Grey Flannel and Twilight inks to sponge the edges of various papers and stickease.  I also added in a couple of the Top Coats Icing Overlays.
Here are some close ups of the detail:
Wonderland Imagine Layout Close Up As there was no Chocolate cardstock left, I used Grey Flannel under the My Stickease snowflakes. I inked the edges in Twilight. The pieces are also cut with our Cricut Art Philosophy Cartridge. The large petal is cut at 2 1/4” with Shift + <Flower7> (pg. 39), the small snowflake is cut at 1 1/2” with <Circle3> (pg. 41). I cut one of the 4x6 Top Coats Icing Overlays apart to create the border across the top of the left page. There is a slight overlap to make the patterns match up. To adhere them, I slid them under the Grey Flannel Snowflake paper. This allows them to lift up to slide an 8x10 photo in and have a beautiful border on your photo.
Wonderland Imagine Layout Close Up 2 On the right page, I added a small Top Coats Icing Overlay to the center of the snowflake stickease. I also inked the edges of the stickease snowflakes, quote, and journal circle. The snowflakes and quote are popped up with 3D Foam Tape. I used the Cricut Art Philosophy Cartridge to cut the photo mats. The two outside mats are cut at 3 1/2” with <Square5> (pg. 63) and the middle mat is cut at 3 1/2” with <Square4> (pg. 53).
Paper Only Kit - $15.00
  • 2 sheets of White Daisy Cardstock ($0.98)
  • 1 sheet of Twilight Cardstock ($0.49)
  • Workshop Guide/Instructions ($1.00)
Basic Kit - $35.00
Required Tools/Add On Options
E1016 My Acrylix® Friendship Alphabet Large $29.95
X7146C Wonderland My Stickease $4.95
Z2124 Grey Flannel Exclusive Inks® Pad $5.25
Z2160 Twilight Exclusive Inks® Pad $5.25
Z578 Corner Rounder $7.95
Z608 Dry Embossing/Scoring Stylus $3.25
Z697 Sponge $1.25
Z341 Memory Book Mini Glue Dots® $7.50
Z1151 3-D Foam Tape $5.95
Y1000 1" × 1" My Acrylix® Block $3.95
Y1002 1" × 3 1/2" My Acrylix® Block $5.95
Y1006 3" × 3" My Acrylix® Block $8.50
My workshop for the 22nd is full; BUT, you can always host your own workshop with your friends (and quite possibly get the Hostess Rewards too!), or you can order and complete your workshop kit on your own. Please add $5.00 for postage to the Paper Only Kit and $6.00 to the Basic Kit (kit will ship directly to you via Fed Ex). 
Hurry! This workshop retires on February 29th (while supplies last after January 31st).
Until next time…
MemoriesSignature1
Related Posts with Thumbnails